
Service tokens are associated with an Equinix Fabric port, a Network Edge virtual device or a network object, and shared with another user to authorize that user to create a connection to a Z-side asset (Z-side tokens) or from your port (A-side tokens).
Prerequisites
Before creating a service token, you must have:
-
An Equinix Fabric account, with one of the following IAM roles assigned: Fabric Connection Manager, Fabric Manager, Fabric Service Provider, Fabric Service Profile Manager, or End Customer Fabric Manager.
Note: For more information, see Roles and Permissions Reference.
- Access permissions to an asset that you want to create a service token for.
Create an A-Side Service Token
To create an A-side service token:
-
Log in to Equinix Fabric.
-
From the Service Tokens menu, select Create Service Token.
-
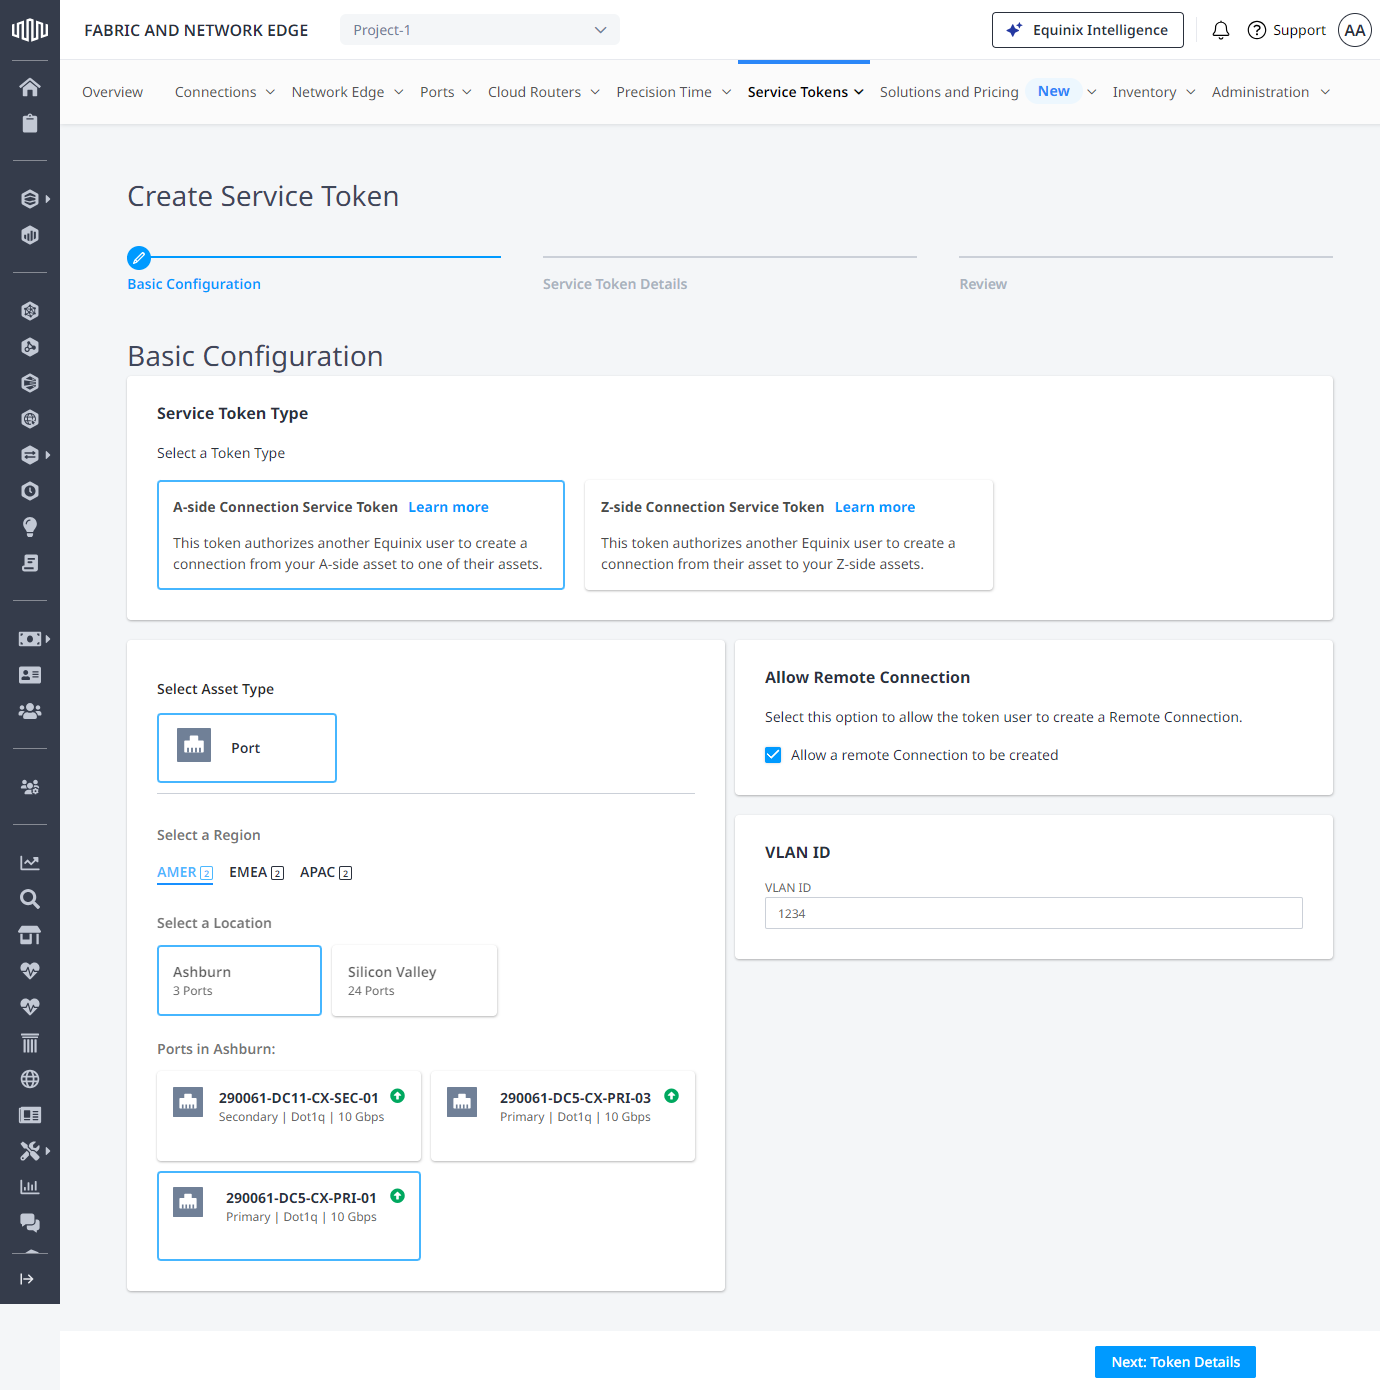
On the Basic Configuration page:
-
In the Service Token Type section, select A-side Connection Service Token.
-
In the Select Asset Type section, click Port.
-
Select a location, then choose a port.
-
Deselect Allow a remote Connection to be created if you don't want to allow connections that terminate in a different metro.
-
Enter VLAN identifier(s).
-
Click Next: Token Details.

-
-
On the Service Token Details page:
-
Select the expiration date.
Tip: The maximum number of days the token remains valid is 90.
-
Set the maximum allowed connection bandwidth that can be established using this service token.
-
Enter the email address(es) of the user(s) who will use the service token.
-
Click Next: Review.

-
-
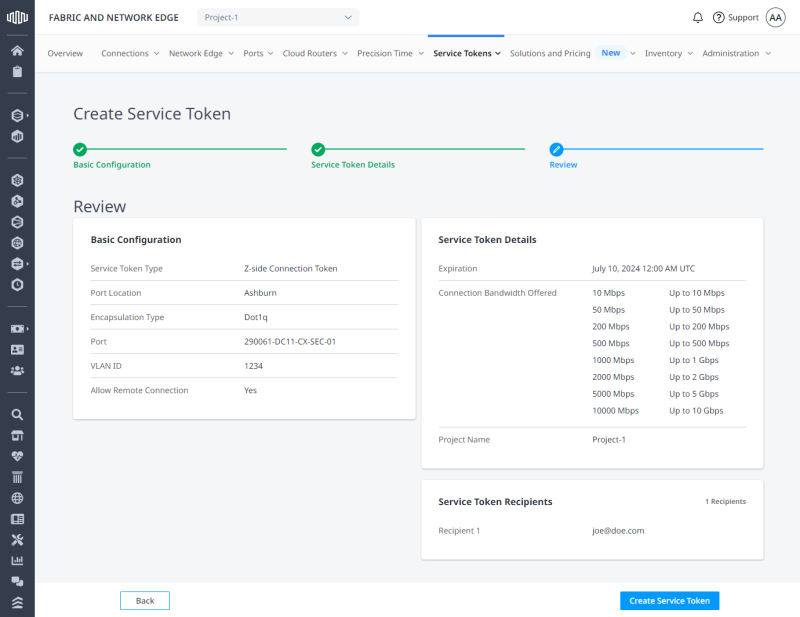
On the Review page, review the service token configuration, details, and recipient(s), then click Create Service Token.
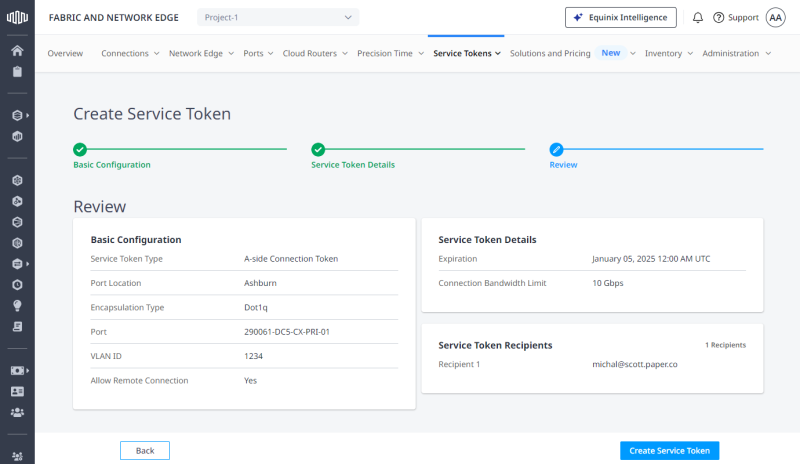
-
Click Copy to copy the service token.
Important: The creator of the A-side token will be billed for the connection.

Create a Z-Side Service Token
To create a Z-side service token:
-
Log in to Equinix Fabric.
-
From the Service Tokens menu, select Create Service Token.
-
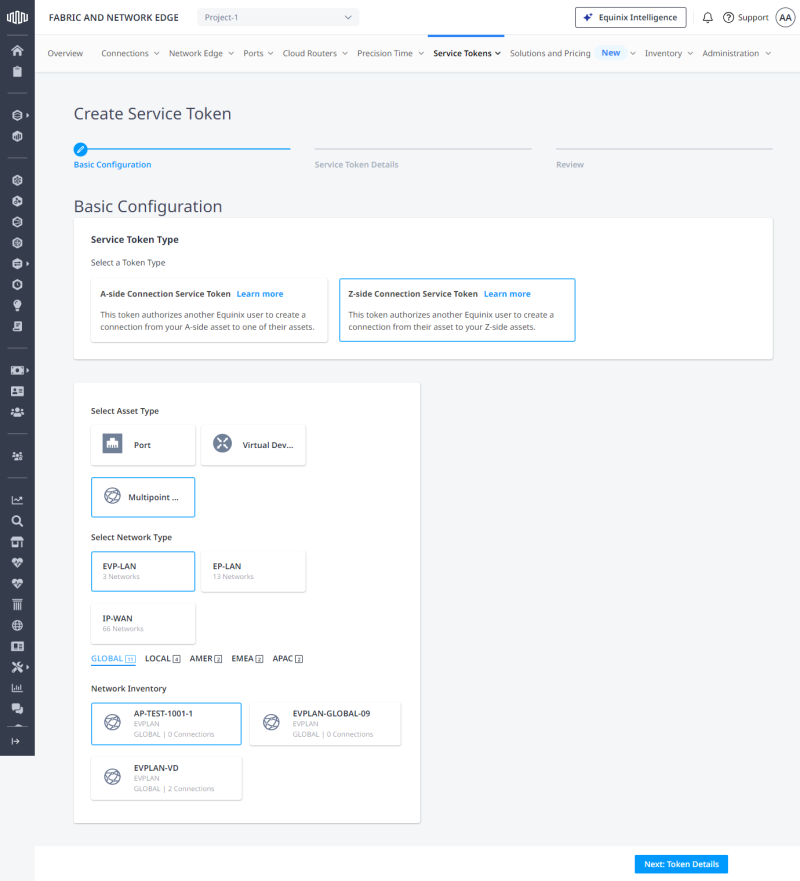
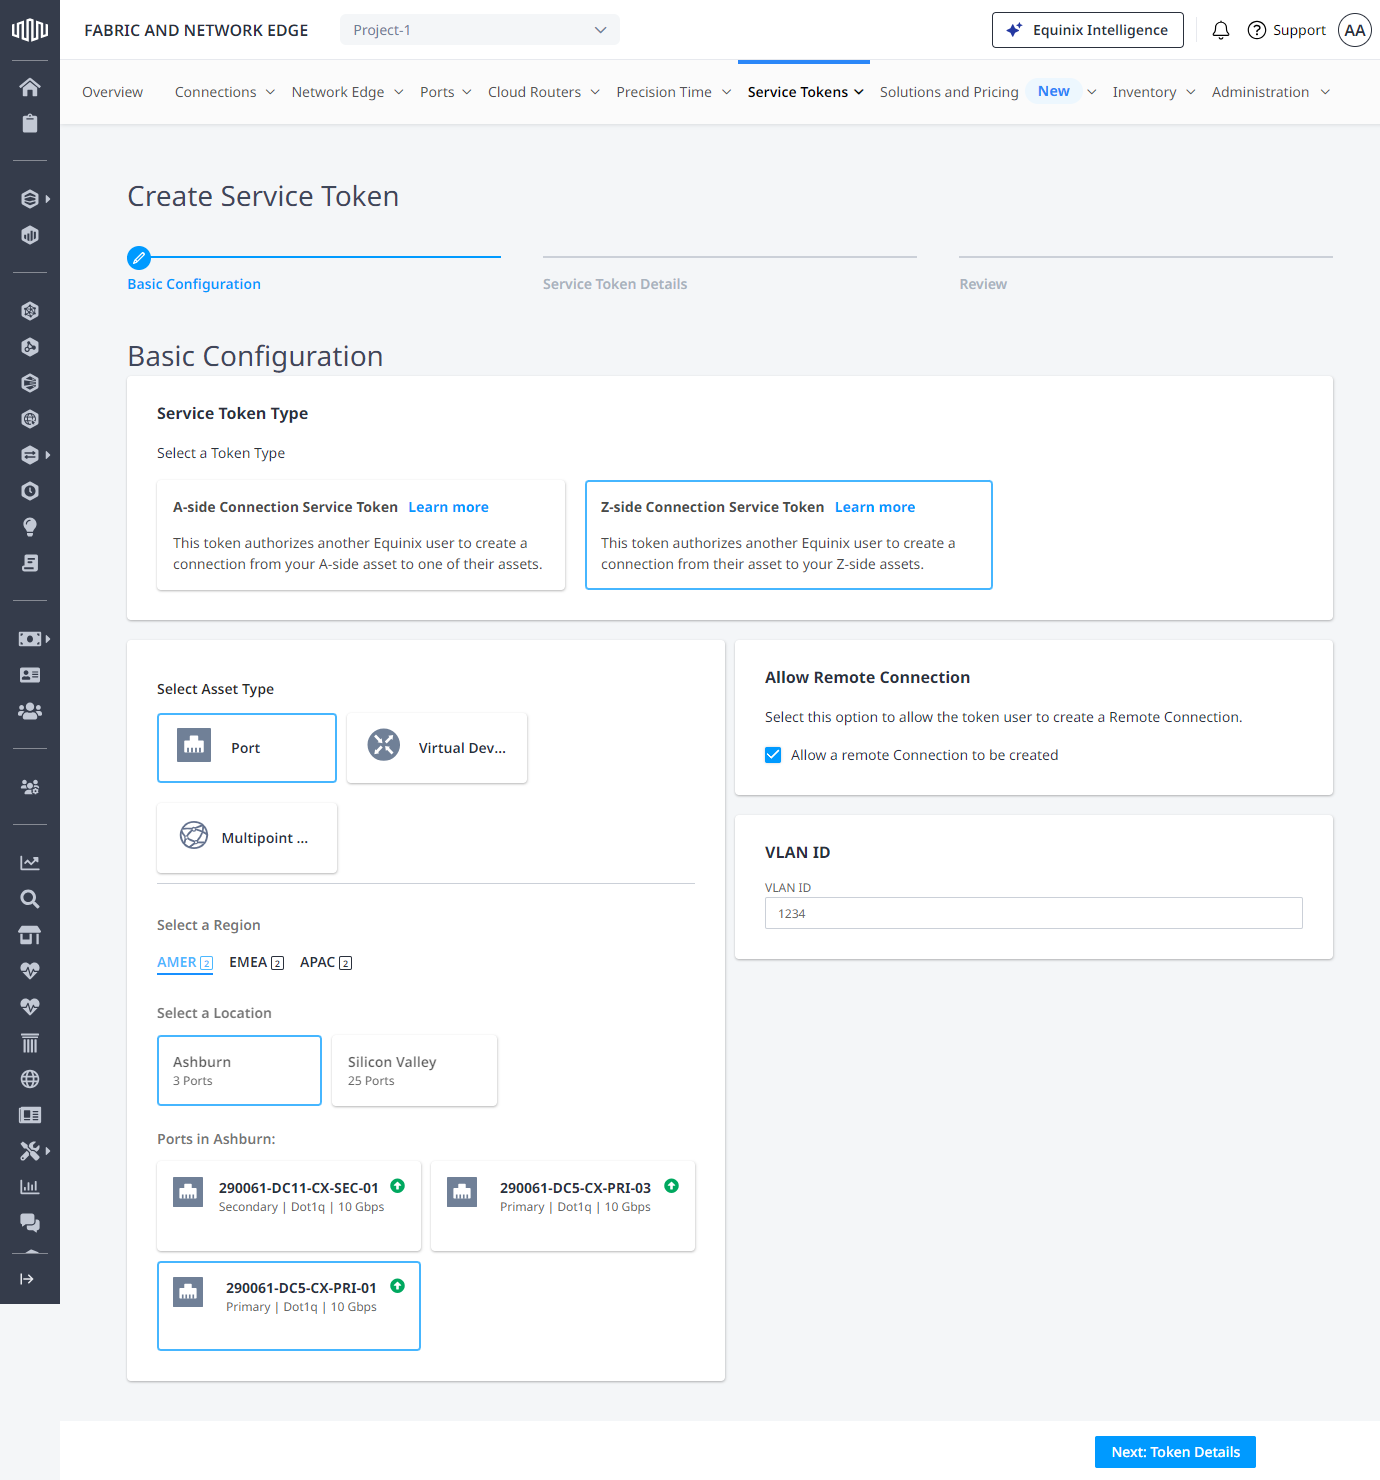
On the Basic Configuration page:
-
In the Service Token Type section, select Z-side Connection Service Token.
-
In the Select Asset Type section, select asset type, then provide token details depending on your selection.
 Port
Port
-
Select a location, then choose a port.
-
Deselect Allow a remote Connection to be created if you don't want to allow connections that terminate in a different metro.
-
Enter VLAN identifier(s).
-
Click Next: Token Details.

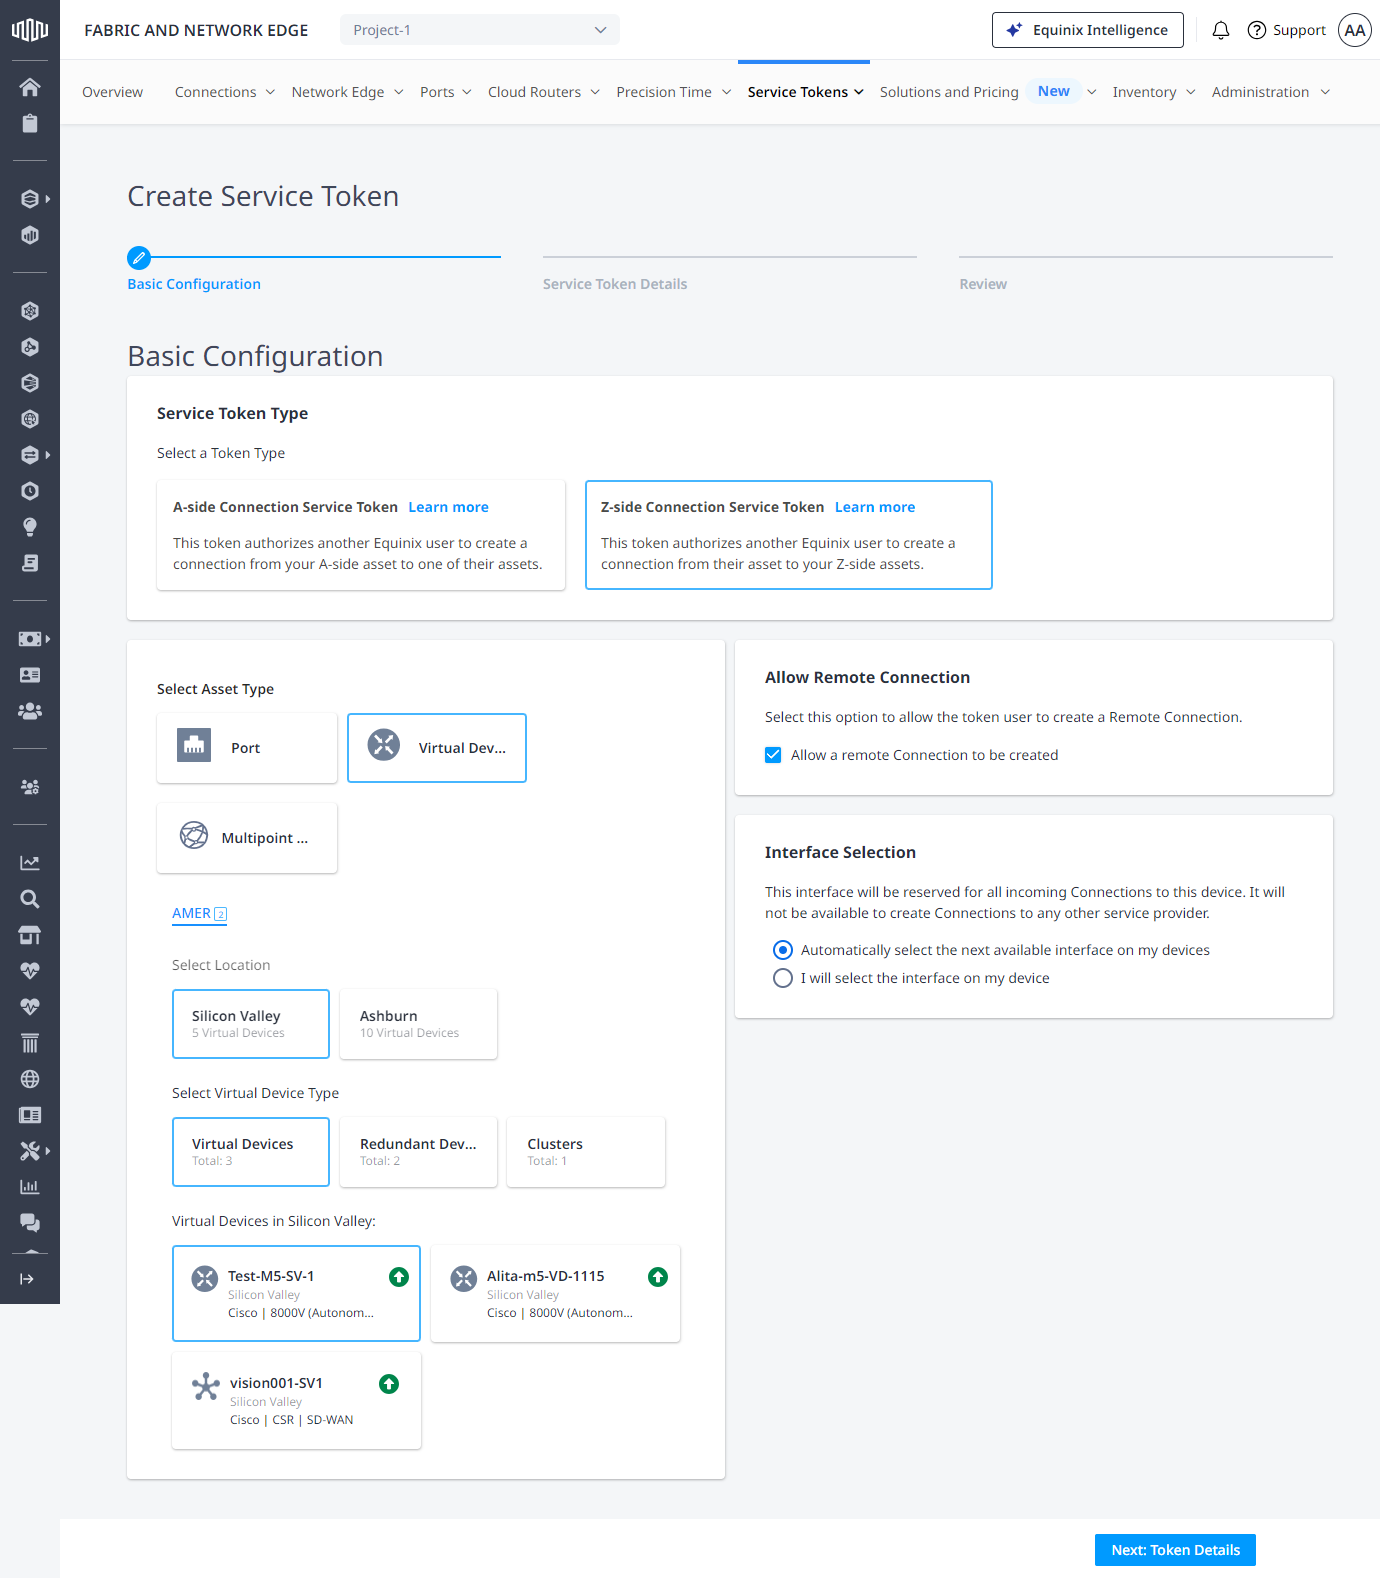
Virtual Device
-
Select a location.
-
Choose a virtual device type:
-
Virtual Devices - Single instance virtual devices.
-
Redundant Devices - A pair of redundant virtual devices.
Important: In case of redundant devices, you must create a separate service token for each device in the redundancy pair.
-
Clusters - Clustered virtual devices.
-
-
Select a virtual device instance.
-
Deselect Allow a remote Connection to be created if you don't want to allow connections that terminate in a different metro.
-
Select a network interface on your virtual device.
-
Click Next: Token Details.

Network
-
Choose a network type:
-
EVP-LAN - Used to connect Dot1Q encapsulated ports or virtual devices.
-
EP-LAN - Used to connect untagged EPL ports.
-
-
Select network scope, then choose a network instance.
-
Click Next: Token Details.
-
-
-
On the Service Token Details page:
-
Select the expiration date.
Tip: The maximum number of days the token remains valid is 90.
-
Set the maximum allowed connection bandwidth that can be established using this service token.
-
Enter the email address(es) of the user(s) who will use the service token.
-
Click Next: Review.
-
-
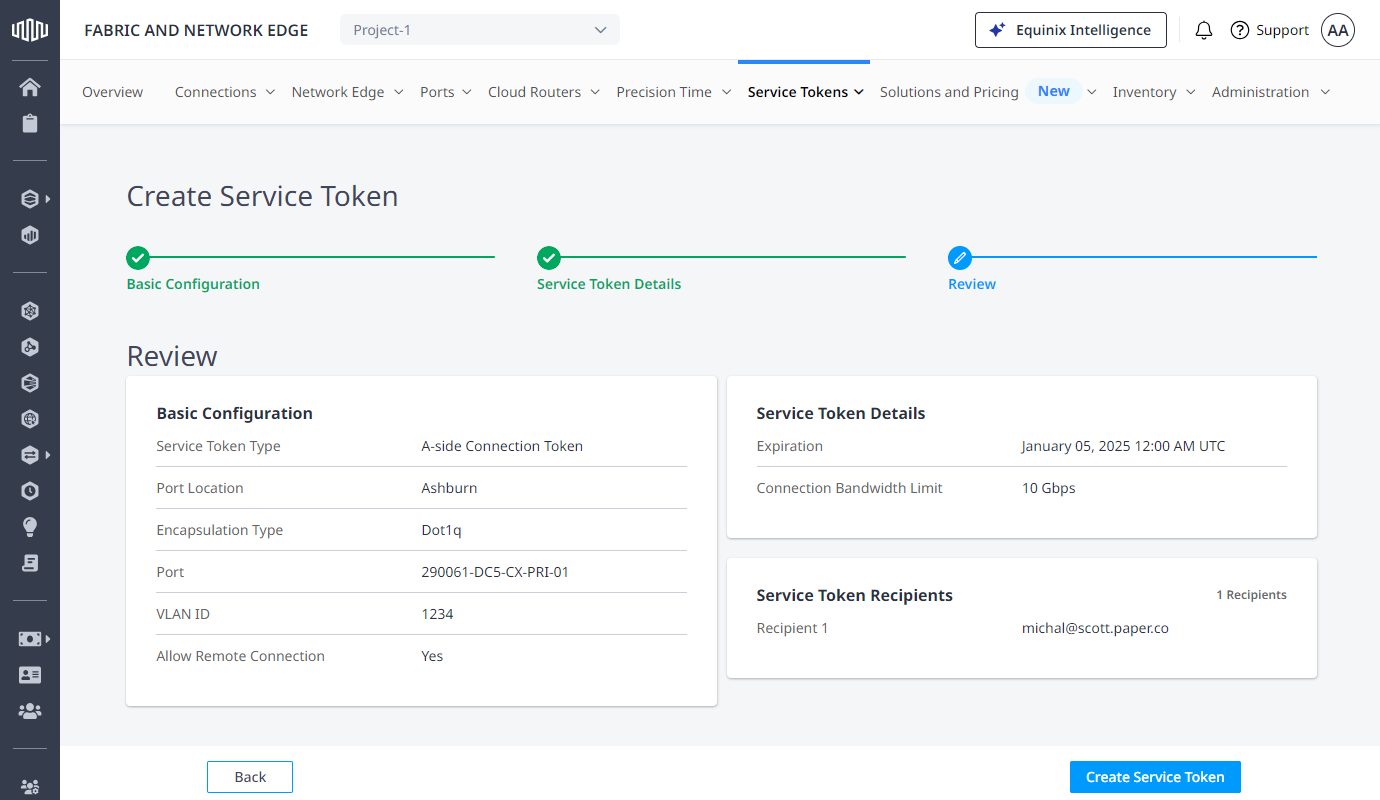
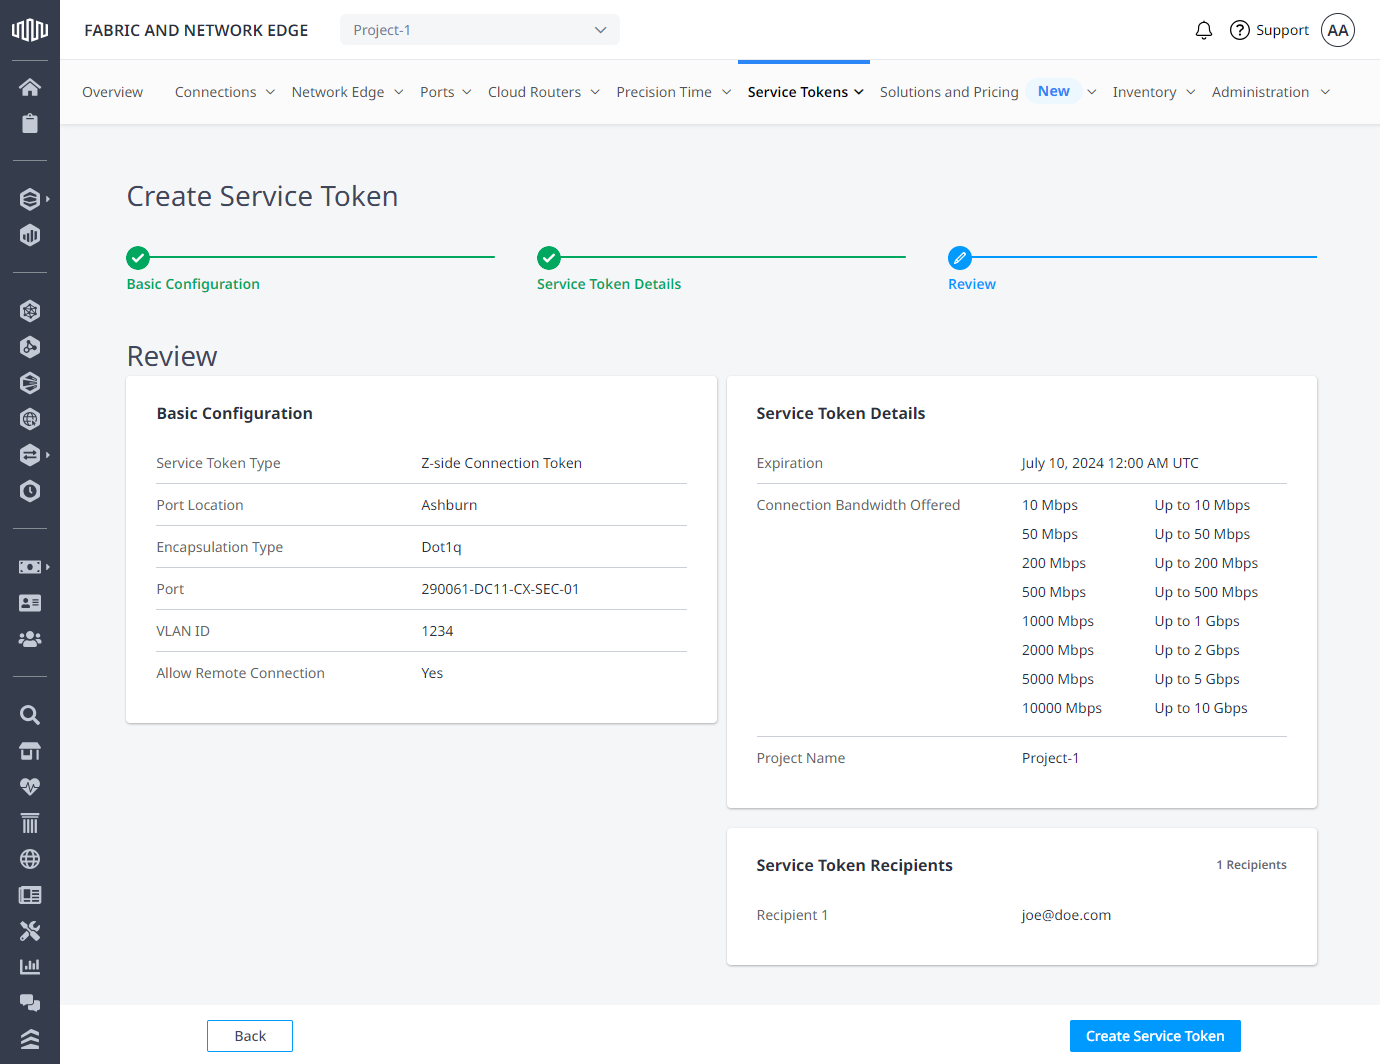
On the Review page, review the service token configuration, details, and recipient(s), then click Create Service Token.
-
Click Copy to copy the service token.
Note: The creator of the connection that uses a Z-side token will be billed for the connection.

Create Service Tokens Using API
You can use Fabric API to automate this procedure and integrate it with your internal systems. For details, see Create Service Token.
